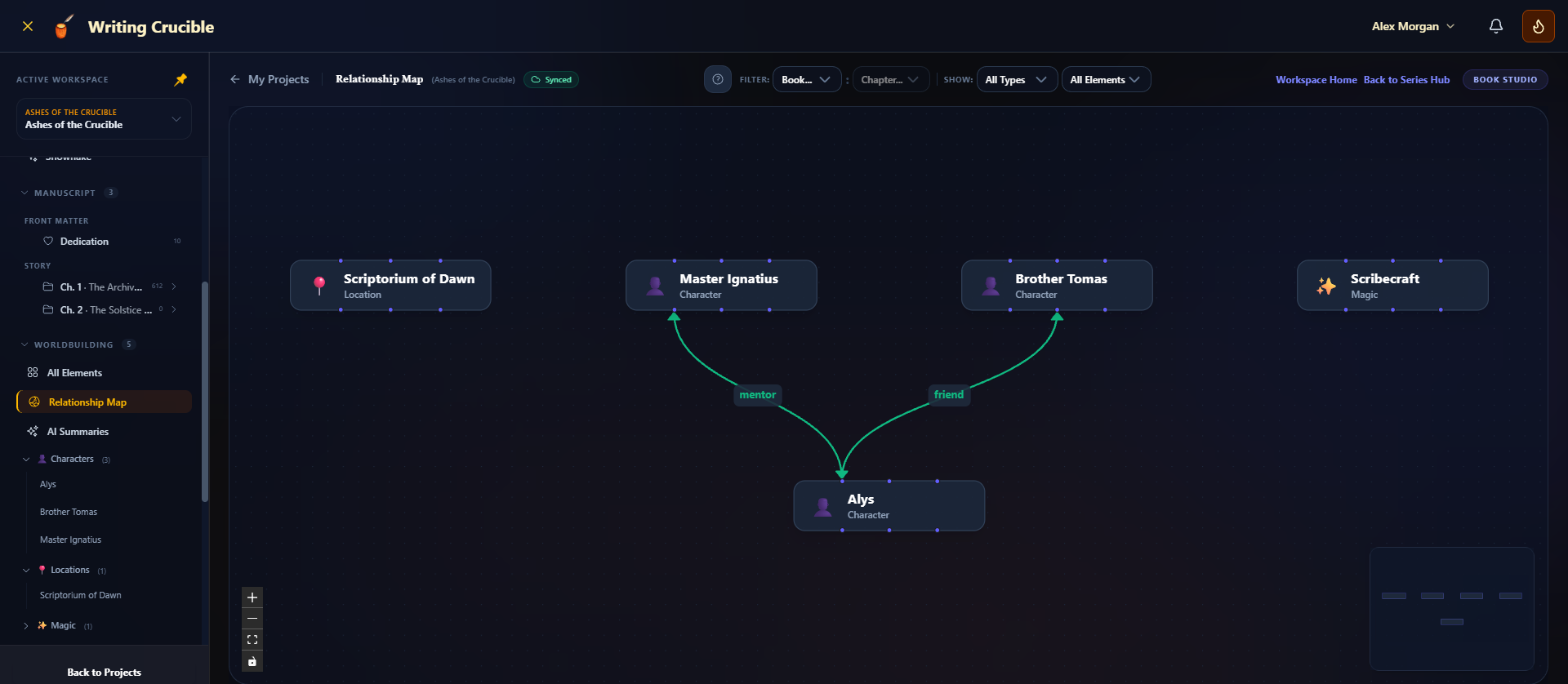
The Relationship Map shows your characters, places and lore as a web of connections. Every element is a box on the map, and every relationship is a labelled line between two of them. Use it to see who is tied to whom, and to add or change relationships without opening each element.
Opening the map
In your project's sidebar, expand Worldbuilding and click Relationship Map. The map includes every element in this book's worldbuilding (or, for a series, the whole series' worldbuilding).
Reading the map
Each box is an element, with its icon, name and type.
Each line is a relationship. Its label says what the relationship is, such as mentor or enemy.
Arrows show direction. An arrow points from the element that holds the relationship to the one it's about. A line with arrows at both ends goes both ways. If the two sides differ, the label shows both, separated by a bar (for example mentor | friend).
Lines are coloured by kind: red for enemies and rivals, purple for family, green for friends, allies and mentors, blue for places, amber for organisations, grey for items, and indigo for anything else.
Click an element to highlight it and its connections; everything else fades. Click an empty part of the map to clear the highlight. Double-click an element to open it on its canvas.
Drag elements to arrange the map the way you like. Their positions are saved. Use the zoom controls in the corner and the mini map to find your way around a large world.
Adding a relationship
1. Drag from one element to another
Each box has small dots along its top and bottom edges. Drag from a dot on one element and drop it on another. The element you drag from is the first one named in the dialog.
2. Choose how the relationship works
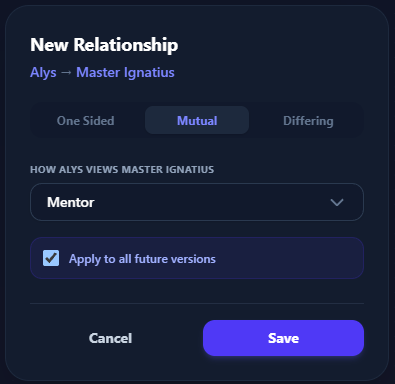
The New Relationship dialog opens. Choose one of:
One Sided: only the first element holds the relationship.
Mutual: both elements hold the same relationship, such as two allies.
Differing: each side sees it differently, such as a mentor and their student. You choose each side separately.
3. Pick the relationship
Choose from the list under How [first element] views [second element]: Father, Mother, Parent, Sibling, Spouse, Partner, Child, Friend, Ally, Mentor, Enemy, Rival, Location, Organization or Other. For Differing, also choose how the second element views the first.
4. Decide which versions it applies to
Apply to all future versions is ticked by default. Leave it ticked to add the relationship to the element's later versions too. Untick it to add it only to the version the map is showing. For more on versions, see Worldbuilding Versioning.
5. Click Save
The map redraws with the new line.
Changing or removing a relationship
Click a line to open Edit Relationship. Change the type or the relationship, then click Save.
To remove a relationship, choose None (Delete) for the side you want to remove and click Save. Choosing One Sided removes the second element's side.
Where relationships are stored
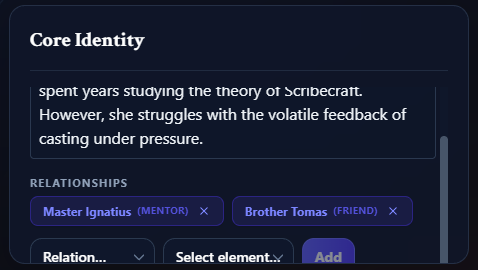
A relationship is saved as a link on the element's canvas, in a Links field. If the element doesn't have one yet, the map adds a Relationships field for it. That means you can also add relationships from the canvas:
Open the element and add a field of type Links to a card (or use an existing one).
Choose a relation (optional) and an element, then click Add.
Every link you add on a canvas appears on the map. Click a linked name on the canvas to jump to that element. See How to Create Worldbuilding Elements for working with cards and fields.
Filtering the map
The filters sit at the top of the page.
Book and Chapter: choose both to see your world as it stands at that point in the story. Each element shows its relationships from its version for that chapter (or the most recent one before it). Without a book and chapter, the map uses each element's latest version.
All Types: show only one type of element, such as Characters.
All Elements: choose one element to see only it and the elements it's connected to.
Click Clear to remove all filters.

On a phone
On small screens the map becomes a list. Search for an element and tap it to see its Relationships. Tap Add Relationship to connect it to another element, tap a relationship to edit it, or tap Open Details to open the element.
Tips
Click the ? button at the top of the page for a short guided tour of the map.
If an element's relationship changes during the story, create a new version at that chapter and change the relationship there. Use the Book and Chapter filters to check how the web of connections shifts.