The Storyboard lays your book out like index cards on a table: one column per chapter, with that chapter's scenes stacked inside it. It's the quickest way to see the shape of your book, move scenes around, and check them against a story structure.
Opening the Storyboard
In the project sidebar, under Book Planning, click Storyboard. For a series, the Storyboard link under Series Planning shows one column per book instead (see Planning a series below).
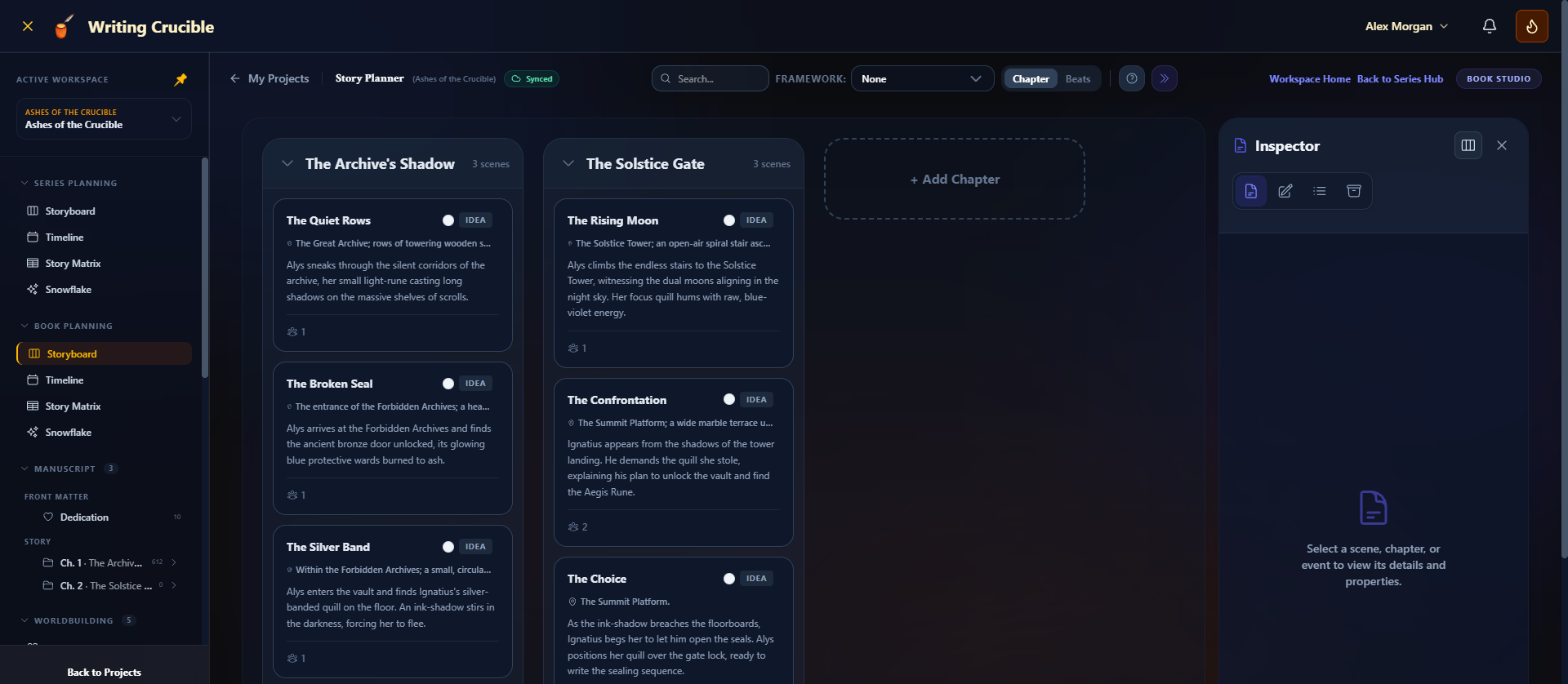
Chapters and scenes
1. Add a chapter
Click + Add Chapter after the last column. The new chapter is added to the end of your manuscript with the status Outlined, ready to write.
2. Add a scene
Click + Add Scene at the bottom of a chapter column. A card called New Scene appears and opens in the Inspector so you can fill it in.
3. Edit a scene
Click a scene card to open it in the Inspector's Details tab. Changes save automatically. You can set:
The title, Target Words and Status (Idea, Outlined, Drafting, Drafted, Revised or Completed).
Summary, Purpose and Mood.
Characters in Scene and Setting, picked from your worldbuilding or created on the spot.
Temporal & Environmental details: time of day, Duration, Weather, Moon Phases and Season.
POV Type, POV Character and POV Notes.
Scene Beats: a short list of what happens, step by step. Press Enter to start the next beat.
Plot Threads: click + Assign to add the scene to a plot thread. The first one is marked Primary; use the arrow to change the order. See Story Matrix for creating plot threads.
Use the coloured dot on a card to give it a colour of its own. To give a scene notes that don't belong in its summary, open the Sticky Notes tab in the Inspector.
4. Edit a chapter
Click a chapter's header to open the chapter in the Inspector. Here you edit its title, status, target word count and its full outline. See Chapter Outlines.
Moving things around
Move a scene to another chapter: drag the card onto the other chapter's column.
Reorder chapters: drag a chapter by its header. This reorders the chapters in your manuscript too.
Set a scene aside: while you drag, a Drop here to unassign scene area appears at the top of the board. Drop the card there, or on the Unassigned Scenes tab icon in the Inspector, to take it out of its chapter without deleting it.
Bring it back: open the Unassigned Scenes tab and drag the card onto a chapter column. The + button on that tab creates a new unassigned scene.
Collapse a chapter: click the arrow next to its title to shrink the column while you work on others.
Use the zoom controls in the bottom-right corner to fit more columns on screen. Click the percentage to reset to 100%.
Working with a story structure
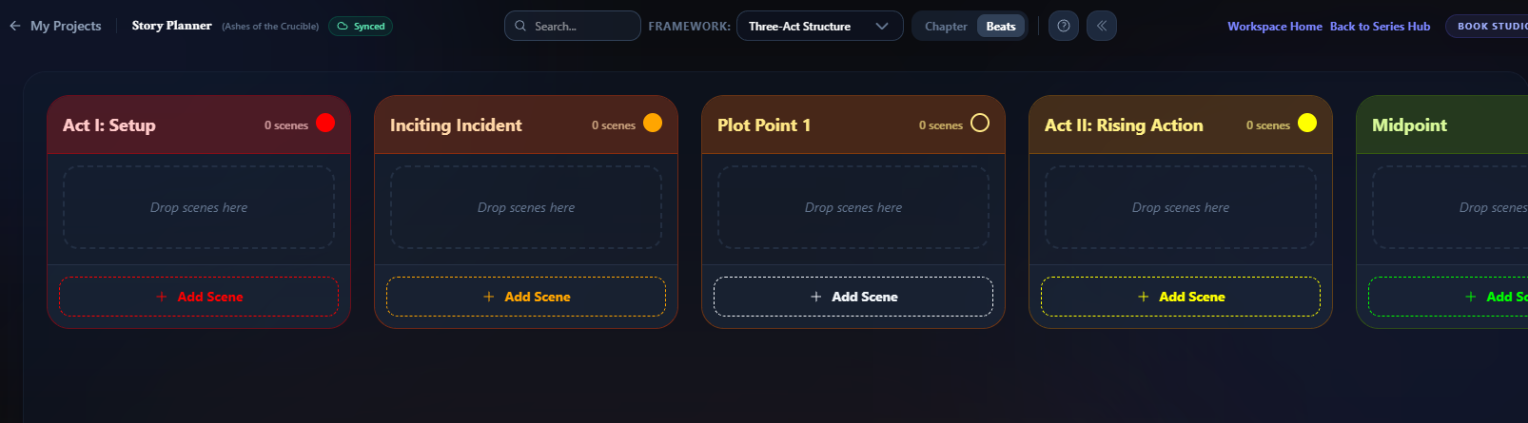
Choose a structure from Framework: in the toolbar, for example Save the Cat! Writes a Novel or Seven-Point Story Structure. Then switch the toolbar from Chapter to Beats. The columns become the framework's beats, and you place each scene in the beat it serves:
Drag a scene onto a beat column to assign it. Its chapter doesn't change.
Click Add Scene at the bottom of a beat to create a scene already assigned to that beat. It starts as an unassigned scene until you drag it into a chapter.
The Inspector's Unassigned Scenes tab lists every scene that doesn't have a beat yet in this framework.
Back in Chapter view, chapter columns are tinted with the colours of their scenes' beats. A warning triangle next to a chapter title means its scenes jump around in the framework: a beat that comes before the previous scene's beat, or one that skips beats. Hover over the triangle to see which scene.
A scene keeps a separate beat for each framework, so you can try a different structure without losing your work in the first.
Deleting
Open a scene in the Inspector and click Delete Scene, then Confirm.
Deleting a chapter is different: Delete Chapter in the chapter Inspector removes the chapter from your book, including its text, not just its plan. Its node on the Snowflake, and everything branching from it, is removed too. You'll be asked Are you sure? This cannot be undone. before it happens.
Planning a series
Under Series Planning, the Storyboard shows one column per book, and the cards are that book's timeline events. Click a book's header to edit its title, status, genre, target word count, tense and description in the Inspector. + Add Book adds a new book to the series. + Add Event at the bottom of a book's column adds an event to that book, and dragging an event onto another book's column moves it into that book. The Inspector's tab is called Unassigned Events here, and holds series events that aren't tied to a book.
Free plan limits
On the Free plan, each book can have 5 scenes (unassigned scenes included) and 5 outlined chapters. See Story Planner Overview.